Remove Stale Guest Accounts
Guest accounts in the world of Azure AD have been extremely useful in allowing external access and collaboration. Yet at times we have feelings of great contrast.
We love guest accounts... and then we hate guest accounts...
These statically created guest users often contain the remnants from old projects or departed users. They are like the guests that never leave your home and end up sleeping on your couch!

Stale guests can be referred to as objects that are not regularly in use. These stale guest accounts are a liability and security risk for every organisation utilizing guest accounts.
Rarely do we see organisations managing guest objects affectively.
Back in 2020 we developed a script to remove inactive and expired guest users by the last signin date. This was achieved by using the Get-AzureADAuditSignInLogs CMDlet.
 JBines
Since then, we have seen a number of improvements on the graph API and we have also seen that Microsoft will depreciate the Azure AD PowerShell module in the near future so time to make some improvements!
In this blog article we will review how are you can automate the removal of guest users based on the last signin information in your tenant.
It must be noted that this script is a supplement to Access Reviews. There are several scenarios where a guest user may ‘keep alive’ the existing access and never relinquish it without an owner’s review and intervention. Yet, few organisations would be happy to remove guest accounts automatically after 30 days of inactivity as required by Access Reviews. We hope this strikes the happy medium between the two. Should you also not have access to a AAD P2 license this may also be of interest.
Azure AD
Step 1 – Azure AD Application & Permissions
Create the Azure AD Application. See the Quick Start.
Assign the Graph API Permissions
AuditLog.Read.All - Access LastLogon information
Directory.Read.All – Maybe required to fix auditlog bug
User.ReadWrite.All - Needed for guest removal (Allow only after extensive testing)
Step 2 – Authentication Types
Certificate Authentication - On the application select in Azure AD select Certificates & secrets and upload the *cer file of which you have the private key.
A self-signed certificate can be created by running powershell the below. MMC can then be used to export the *.pfx and *.cer file.
$date_now = Get-Date
$extended_date = $date_now.AddYears(30)
$cert = New-SelfSignedCertificate -certstorelocation cert:\localmachine\my -dnsname Remove-StaleGuests -notafter $extended_date -Provider “Microsoft Enhanced RSA and AES Cryptographic Provider” -KeySpec Signature
Running from the Console
Step 1 Install MSAL.PS Module
The MSAL.PS Module was used to retrieve a token for access to the graph api. Install it by running:
Install-Module -Name MSAL.PSYou should be able to run the script now from your local console.
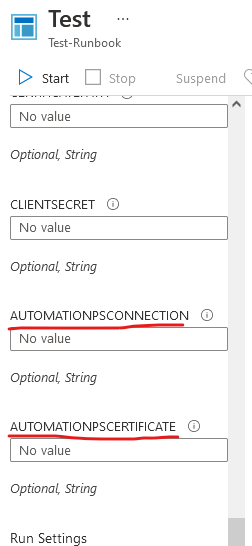
Remove-StaleGuests.ps1 -InactiveTimeSpan 365 -RemoveExpiredGuests:$true -AppID "7af89f06-f1cc-4ff7-aee8-b6a43f6a0ae2"-TenantID "557febb4-aa10-4520-80d1-280058cb8353" -CertificatePath "cert:\LocalMachine\my\303A498735t987876245kjlnsfv3495784"
-- REMOVE EXPIRED GUESTS VIA CERT AUTH --
In this example the script will remove expired guests that have not accepted the invite after 90 days.
Remove-StaleGuests.ps1 -InactiveTimeSpan 720 -RemoveExpiredGuests:$true -RemoveInactiveGuests:$true -AppID "7af89f06-f1cc-4ff7-aee8-b6a43f6a0ae2"
-TenantID  "557febb4-aa10-4520-80d1-280058cb8353" -ClientSecret '2pT\H8{u28y^fhG,'
-- REMOVE EXPIRED GUESTS & INACTIVE GUESTS FOR 2 YEARS VIA CLIENT SECRET --
In this example the script will remove guests that have not accepted the invitation after 90 days
and have been inactive for 2 years.
Running from Azure Automation
Step 1 – Create the Automation Account and Runbook
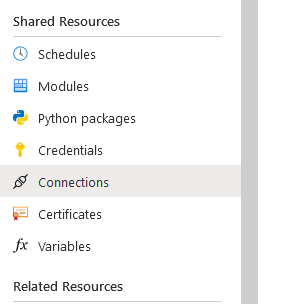
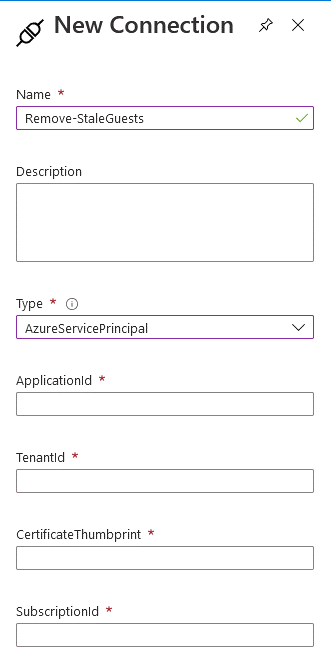
Step 2 – Create the Automation Connection
In the left pane, under shared resources select Connection. Push New Connection and from the drop down window select AzureServicePrincipal.
Step 3 - Create the Automation Certificate
In the left pane, under shared resources select Certificate. Push the button, Add a certificate and then upload the certificate.
Step 4 – Create a schedule
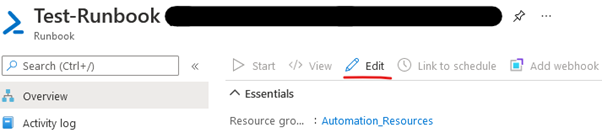
Step 5 – Edit Runbook and test
Select Edit, Upload from https://github.com/JBines/Remove-StaleGuestsand test.